Customizing the menu in EspoCRM
Every business company is unique in its structure, that’s why when implementing a CRM software, the customization of its interface is significant for the further work of your employees. Today we will tell you how to customize a menu bar and tailor it according to your company’s needs and requirements.
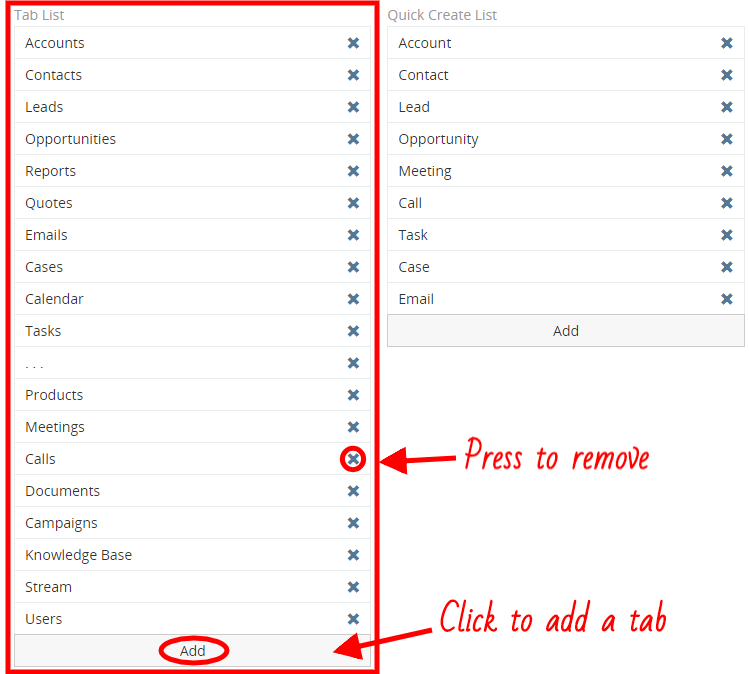
Where to start? So, to begin configuring the menu, go to Administration > User Interface. Except for changing your company’s logo or theme, here you can also customize the menu according to your liking by adding (press add button and choose a tab from the list), removing (press ![]() ) and even reordering (use drag and drop feature) tabs.
) and even reordering (use drag and drop feature) tabs.

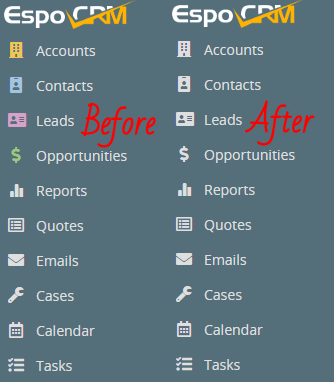
There you can also disable or enable scope and tab colors as well as tab icons, just by checking the needed checkbox.

As an example, let’s check the Disable tab colors checkbox and see the results.

You are also able to change the tab icon and its color. Just follow Administration > Entity Manager > Entry for specific entity type > Edit and choose the needed icon and the color.
Finally, to make sure that all the changes are saved, click Clear Local Cache at the top drop-down menu.
Hope the information was useful for you! Thanks for paying attention!
